Wiring Smart Pixels
The most important part of your show is the wiring. This heavily affects the cost, ease of setup/take down, and how easy it is to fix problems. It is important that you thoroughly understand wiring, before you choose how you want to layout your show.
How Many Pixels?
First, let me list some of the basic guideline that you should follow to ensure that you do not have issues with your hardware. These are guidelines which can be violated, but ensure that you clearly understand what you are doing.
1) Only drive fifty 5Vdc pixels without power injection.
2) Only drive one hundred 12Vdc pixels without power injection.
3) Do not use ground loops in your power.
Wiring Methods
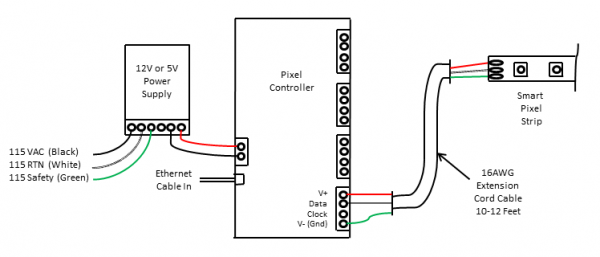
By far the least expensive method to drive smart pixels is with a large power supply powered through your controller. The only other components required is a power cable to the pixels. It is recommended that you use 16AWG extention wire in lengths of 10-15 feet, which is cheaper bought as an extension cord. The only cost for this layout is the controller and the wire.
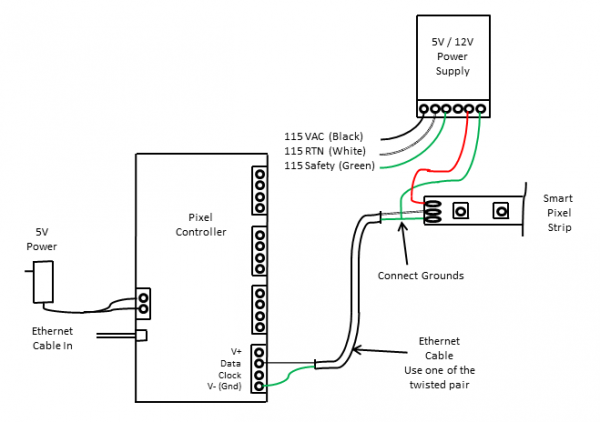
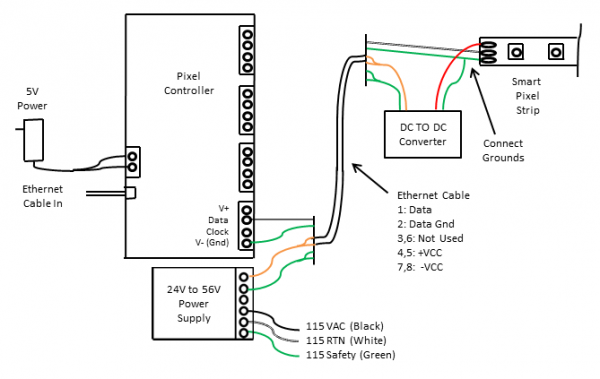
If the pixels are further away from your controller, it is best to use a local power supply and Ethernet cable for the control lines. If you use Ethernet cable to drive the control signals, with 100 ohm source termination, it has been demonstrated to work at 100 feet. The drive chip used was an 74ACT541 versus the standard 74HCT541. The ACT parts have more current drive, which will improve your ability to drive the signal further.


